The Service Portal
What is SP
Access to the Service
User interface
What is SP
The Nivola Service Portal (NSP) constitutes the Reserved Area for customers and integrates in a web interface all the functionalities offered by the platform. It provides the full range of functions designed to create, control and manage your own cloud services independently. Through a set of simple and intuitive graphical wizards, all the services offered by Nivola can be used by users, even those without specific technical skills. The user can constantly monitor the status of resources through integration with monitoring dashboards, information and reports on costs and consumption, can create new services and communicate with the Nivola Support Center using different communication channels.
Access to the Service
from the following authentication systems:
SPID
CIE - Electronic Identity Cards
TS-CNS - Health Card System
PSNet
Piedmont system
Regardless of the authentication system chosen by the user, the Nivola Service Portal will proceed to
redirect the user to the correct Identity Provider for verification of credentials
obtain the user’s tax code
authorise access to the Nivola platform according to your profile
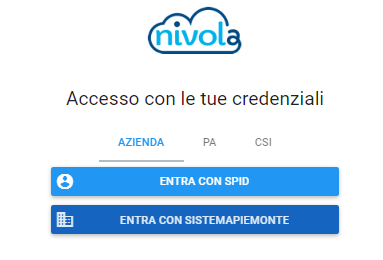
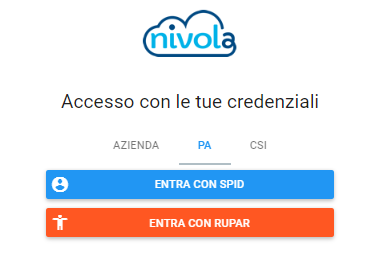
This is the window that is presented to the user when logging in:
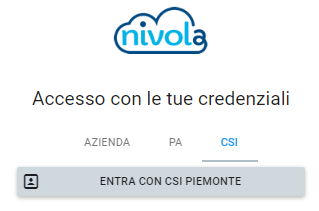
Depending on the type of customer, the user can choose between
Company
PA, for Public Administration customers
CSI Piedmont staff
It is possible to access using SPID credentials or Piedmont system for public administration.
PA. It can be accessed using SPID or RUPAR credentials.
User interface
After l’autenticazione user is presented with their own personalised Home Page. The content displayed depends on the user’s role in the system.
The User Home Page is divided into 3 distinct sections
1 – Status bar

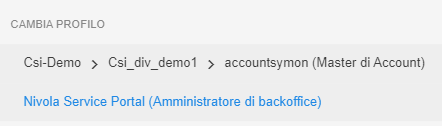
It is located at the top of the system and indicates which user and which profile the user is logged into the system with.
If the user has other associated roles, he can change the profile under which he acts within the system. By pressing on

The “Change profile” menu is presented, with which the user can change his profile
 Allows the user to contact support via chat.
Press instead  to access Nivola’s online documentation.
To exit the system and close the work session press the symbol 
2- Menu navigation
The left-hand side menu contains the list of services that the user can consult and use according to his profile.
The navigation menu consists of several sections according to the type of services.
The first section
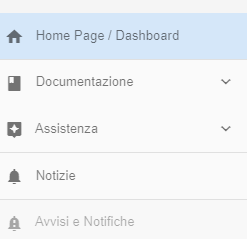
allows access to all the information material on Nivola via “Documentation”, allows contacting assistance via “Assistance” and to have the details of news and information on the platform via “News”.
The “Tools” section
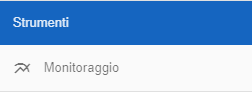
It contains the menu items for accessing the tools offered by the platform to its users. For example, the monitoring consoles or log display systems can be accessed from here.
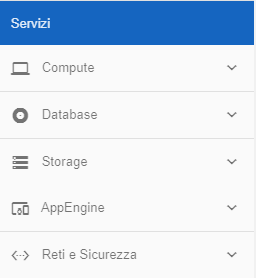
The “Services” section is the menu of the services offered by the Nivola platform. In this item the user will find the list of all the services on which he can operate within Nivola to create his own Cloud resources.
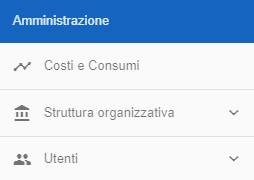
In the “Administration” section all those items are made available that allow the user to manage, according to his profile, user profiling and accreditation, or he can view the details of his organisational structure and access the pages detailing the costs and consumption of his Cloud.
3 - Home Page
This is the initial page presented to the platform user. It is composed of a set of dynamic dashboards displayed by default according to the profile with which it is accessed. Through this home page the user can see a summary of consumption and the status of their services and consult the latest news published.
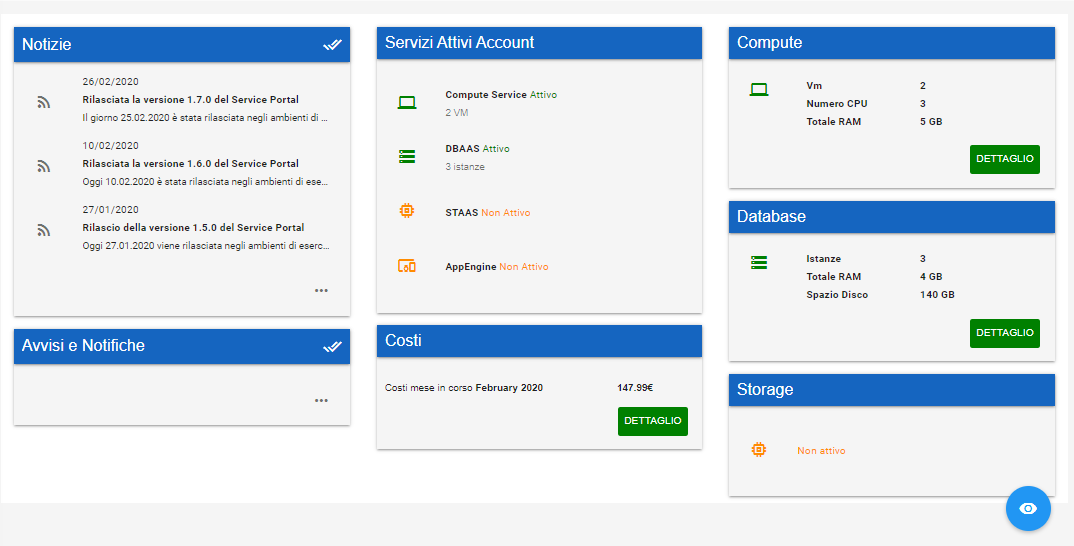
The Home Page is customisable by the user, who can set the display and layout of the dashboards according to his preferences or priorities.
To activate the Home Page edit mode, press

At this point it will be possible:
Disabilitare la visualizzazione di una dashboard. Per fare questo premere il simbolo evidenziato presente nella dashboard che vi vuole non più visualizzare in quanto non di interesse
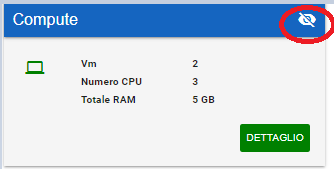
Disable the display of a dashboard. To do this, press the highlighted symbol on the dashboard that you no longer wish to view as it is of no interest.
Move the dashboard within the HomePage frame. To do this, hold down the mouse on the blue bar of the dashboard and move it within the workspace. Release the mouse once you have defined the new position.
To confirm changes to the layout and make the personalised home page effective, press
